
This article will examine how to eliminate a back bicycle wheel with no speedy delivery. We should begin. As a rider, you might have to stop your rear bicycle wheel to fix a level, fit your bicycle into a vehicle, or keep away from a robbery. This is straightforward work that requires no hardware on the off chance that your bike has a speedy delivery, which most current bikes do.
Consider the possibility of not approaching a fast delivery. Keep pursuing to figure out how to eliminate a back bicycle wheel with no speedy delivery. The accompanying devices are expected to stop a rear bicycle wheel. It’s really smart to have a bicycle sack with instruments and new parts on the off chance that you want to stop a wheel or fix a level, particularly assuming you’re riding significant distances.
You’ll require the accompanying instruments to eliminate a back bicycle wheel that doesn’t have a fast delivery:
Bicycle fix stand: Park your bicycle here while working on the wheel.
15 mm wrench: When relaxing and fixing stray pieces, a 15 mm wrench is utilized to offer grasp and mechanical benefits.
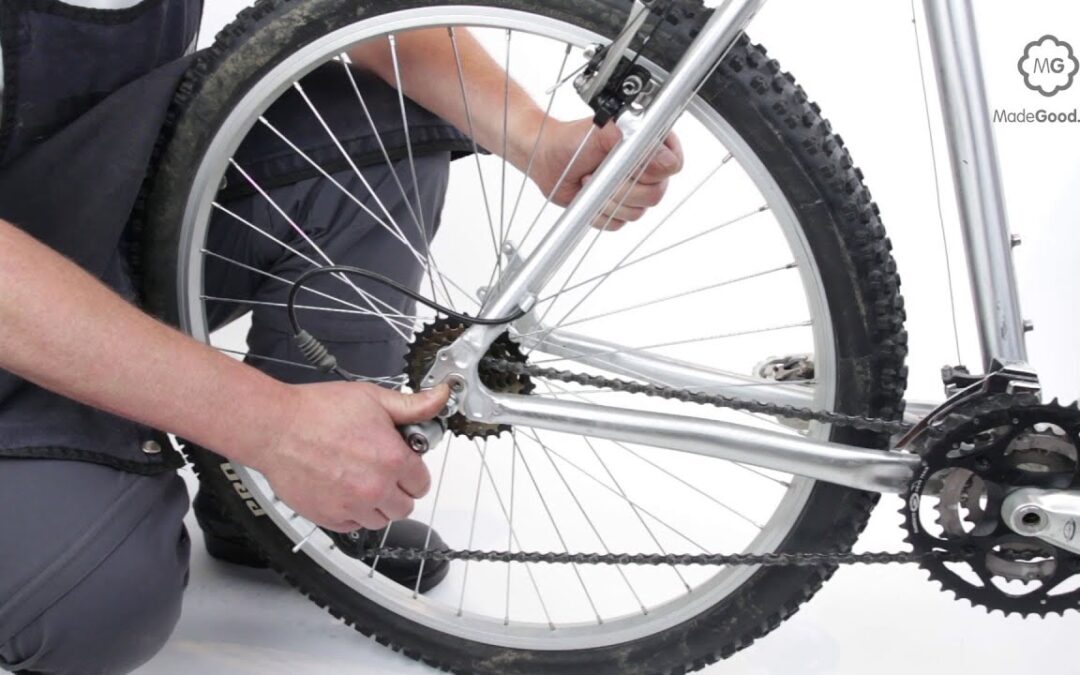
Instructions to Remove a Rear Bike Wheel without Quick Release
A through hub (or non-speedy delivery) wheel connection component gets the center points between the dropouts in the fork and casing. These dropouts have openings rather than spaces. Thick, strong pins with a strung end makeup through axles. Since there are no openings, the wheel should be removed from the bicycle by eliminating the hub. The methods framed here tell the best way to stop the back bicycle wheel without the utilization of speedy delivery and without harming the chain or moving.
- Ease Up the Smallest Sprockets – Bike’s back wheel should have the option to “slide out” of the casing as promptly as expected. However, the initial step is to put it down and check for straightness. At the point when a wheel becomes stuck, strain works between the back derailleur and the rider wheel, making the sprocket obstructed turning it harder to eliminate the wheel.
- Switch the Lever – Invert the back switch to the vacant position, then, at that point, eliminate the switch’s end out of the transporter break and out of the hub. From that point onward, slide the corner away from the wheel until it’s not generally appended to the haggle side thump is no longer there.
- Allow the Wheel To fall Off – Pull the back derailleur in reverse, making the back wheel tumble off.
If your bicycle has an SRAM type 2 derailleur, move the derailleur or arm towards the front and snap the lock button to lock it. When the chain loosens, you’ll have the option to pull the back derailleur. Accordingly, your back bicycle wheel will fall off the casing because of a deterrent freeway for the pivot.
Steps to Follow to Refit the Rear Wheel
You’ll have to know how to supplant the back bicycle wheel since it has become obvious to eliminate it without utilizing a fast delivery. In this way, we should see how to turn the back tire on.
- Reassembling the back wheel is more mind-boggling since it needs binding the sprockets and directing the rotor, which is sandwiched between the brake cushions and caliper. The actions to take are as per the following:
- Twofold takes a look at the arrangement of the pivot and casing dropouts.
- Place the chain and sprocket where they should be.
- Ensure the chain is streaming under the pivot or more modest sprockets.
- Pull the wheel in an orderly fashion until it falls into position. You’ll have to reassemble the edge and wheel at this progression while utilizing your fingers to direct the pivot.
- Supplant the through the hub and tenderly pivot it through the center point to reassemble the seat.
- Fix the pivot until it’s again into the right spot, ensuring the level is open until the hub end comes into contact with the dropout. Right now, it ought to begin to switch, drawing in the pivot and casing strings.
- Close the switch by fixing the pivot and ensuring it’s sufficiently solid to hold the casing and center back from moving.
The majority of riders are able to remove their back wheel. You may, however, need to repair a flat tyre, store it inside your car, or perform routine maintenance. It has become a simple technique that requires no tools thanks to a quick-release mechanism. But what if your bike doesn’t have a quick-release mechanism? Here are numerous alternatives to removing the rear bike wheel with a quick release. Removing a rear bike wheel is simple without a quick-release device. Without the use of a quick-release mechanism, a wheel can still be removed. You can also follow these steps to get started:
- You can do this by properly preparing your bike, disengaging the brakes and derailleur gear, and releasing the nuts.
- You’ll need a screwdriver, two spanners, and possibly a set of pliers.
- To fit the tyre past the brake pads, detach the rear brake line holding the brakes using the screwdriver and pliers.
- To avoid scuffing the seat and bars, turn the bike upside down on the handlebars and sit on a mat or towel. (If possible, use a bike repair stand.)
- Fit the two spanners to both wheel nuts, one on each end of the axle.
- Keep one spanner in place while loosening the nut with the other. Tighten the nut on the first side with the spanner you just twisted.
- It’s time to loosen the nuts now that they’re completely accessible. Both ends of your bike wheel are normally equipped with 15mm nuts. To separate your wheel from the bike frame, unscrew these nuts.
- To release the nuts, you’ll need a tool for this step. Keep in mind that the tool you’ll need must fit 15mm nuts exactly. Look for a wrench or spanner that can completely round a 15mm nut.
- Before twisting the nuts to the necessary degree, check the location of the washers with a matching spanner. Check to see if the nut is moving, and if so, move it gently in the direction of unscrewing. The opposite nut can now be unscrewed as well.
- Loosen each nut a little at a time while keeping the axle together with the other ones.
- You can now stand behind the bike with your head on the centre-line after the nut has been completely loosened and released. Before removing the wheel, it will provide you a better angle. The wheel is not completely removed from the bike in this step.
- By gripping the left side of the bike and securing the end of the nut on the other side, you may gradually release the bike frame from the wheel. While entirely removing the derailleur body from the wheel, your left hand should provide support.
- While removing the wheel from the frame and lifting the chain around the end of the axle, you’ll need to hold/lift the oily chain off the sprocket.
- It’s considerably more difficult to put it back on your bike correctly, and you’ll need help!
Final Words
Preparation is the first and most critical step in removing the rear bike wheel without the use of a quick release. If you have a bike repair stand, you should use it to keep the bike steady while working on it. If you don’t have a stand, you can lay your bike down. The position of your bike is important not only for convenience, but also for removing your rear bike wheel at a correct angle. As a result, I believe it is preferable to use a bike repair stand when performing this task.